 05-05-2020, 05:07 PM
|
#1 |

Join Date: Mar 2015
Location: Spokane, WA
Posts: 253
|
My 2020 TaoTao Hellcat "Grommet"
Just making a thread to document my bike, info, questions and mods.
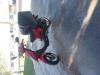
2020 TaoTao Hellcat 125cc grom clone  MFD: Zhejiang TaoTao Vehicles Co, LTD. Imported by: Tao Motor Inc. 125cc horizontal engine (code 154 FMI) Manual 4 speed trans (1-N-2-3-4) w/clutch 120/70-12 tires (front & rear) - Celimo brand 16T front, 34T rear sprockets - 428 chain Bought from TXPowerSports (online), 4/23/20, $1,148.89 delivered (using "motocheese" discount). Easy to work with, very responsive to emails, no issues. Home delivery w/lift-gate via SAIA, 4/30/20. No shipping damage, no hassle, prompt delivery exactly when told would be there. Inside the box. Oh... fun... some assembly required. I was very thankful to find no damage to the bike. Only a few faint scratches... nothing otherwise to worry about. Time to take it all apart and see how it ticks!
__________________
'20 TaoTao Hellcat 125 "grommet" '04 Yamaha TTR-125LE '00 Yamaha TTR-90 '07 Kinroad XT200GY Runmaster (sold) '07 KMD GY6 150cc ATV (sold) '07 Kangchao 250cc ATV Monster (sold) Baja Moto DB-30 "Doodlebugs"(x3) (sold) '06 Hi-Bird 200 parts bike (sold) Last edited by ripcuda; 05-06-2020 at 11:15 AM. |

|
|
05-05-2020, 05:08 PM
|
#2 |
|
Join Date: Mar 2015
Location: Spokane, WA
Posts: 253
|
Hellcat teardown. Pulled all plastics. Inspected all wiring, cable routing, screws, nuts & bolts, chain, etc.
Pulled carb. PZ-25 Keihin clone. Slotted the tamper-proof bowl screws... got me into the jets. Stock jets: 88 main, 32 pilot. Drilled out main to 90 (mm). Put one thin washer under the throttle needle (for better midrange). Also drilled out A/F screw tamper-proof plug and set A/F screw to 1 turn-out. I read all about replacing the engine mount bolts. That rear one looks like a PITA job. I see my bolts look different from all other bolts on the bike. Clearly show 'MEV 12.9' on the heads. Upgrades? Or wishful thinking? I left them alone for now. I also pulled the exhaust off. There was a serious booger weld all the way around on the inside of the exhaust header. Talk about a restriction in exhaust flow! I ground this open for better flow. The one issue I feel was just wrong with the assembly of the bike, was the head stem was way too tight. Made the steering notchy as you turned the handlebars back and forth. Oddly, this was the case on my old 2007 china bike too. So I strung the bike up off the ground and pulled the forks and triple tree and head stem out. Thankfully the bearings and races were fine. So lubed them up good and reinstalled with proper torque this time. Nice and smooth steering now! Cheers! Last edited by ripcuda; 05-05-2020 at 06:34 PM. |
|
|
|
05-05-2020, 05:09 PM
|
#3 |
|
Join Date: Mar 2015
Location: Spokane, WA
Posts: 253
|
Mods:
#1 - Jetted carb (see post above for pic). Opened main jet from 88 to 90 (mm). Shimmed needle with 1 thin washer. Set A/F screw to 1 turns out. Engine runs great, no bog/hesitation/stumbling, starts easy #2 - Removed fuel tank vapor canister and plugged the port on the intake elbow that sucked from it. Removed all the hoses which freed up a nice spot to relocate the CDI box (so it's not squished under rear lip of the fuel tank). #3 - Removed booger weld in the exhaust header pipe (see post above for pic). The exhaust pipe is tiny to start with. In the regular pipe, I can fit my whole fat finger in it easily. This welded part was so restrictive, I couldn't get my finger in past the first knuckle! I ground the weld back for less restriction. Gotta be at least a 1/2hp gain right there!  #4 - Rear fender eliminator. I pulled the huge monstrosity of a rear fender off and was amazed by how heavy it was. Took it apart to find some solid metal bracing under the plastic in the tail fender. I pulled the metal bracing out and cut it up... shortening it (and re-welded) just long enough so the stock turn signals would clear the muffler. Paint hides the welder I ain't. Not too shabby! #5 - (future) knobby tires Cheers! Last edited by ripcuda; 05-05-2020 at 06:11 PM. |
|
|
|
05-05-2020, 05:09 PM
|
#4 |
|
Join Date: Mar 2015
Location: Spokane, WA
Posts: 253
|
I have to say, I'm in love with this little, slow bike! I puts a big smile on my face every time I ride it. It's so easy to swing a leg over. It starts so effortlessly. It's really quiet overall... I like that. The gear shifting is precise, and proper... 1 down, 2-3-4 up. The build quality is definitely better than the 2007-era bikes and atvs I've had. It's so light and nimble to flick around while riding. The clutch is so light and easy. Only 10 miles so far... many more to come! Cheers! Last edited by ripcuda; 05-05-2020 at 06:27 PM. |
|
|
|
05-06-2020, 12:10 AM
|
#5 |
|
Join Date: Jun 2018
Location: Florida
Posts: 759
|
I own a 2004 Sportster , that nowadays rarely makes it out of the garage .It's just so much easier to hop on the Vader and hooligan ride down to the corner store etc rather than having to wrestle the Sporty out to do the same thing.
I'm certainly not saying a Grom Clone can replace a Sportster , but they sure are easier to just jump on and go for errands , now "the big bike" mostly is used for when i need to make long distance trips or need to be somewhere that entails freeway speeds or jaunts.
__________________
2001 Mustang GT 2004 Sportster 2018 VADER 2020 Orion RXB250L |
|
|
|
06-23-2020, 03:15 PM
|
#6 |
|
Join Date: Mar 2015
Location: Spokane, WA
Posts: 253
|
Next round of mods:
#5 - Mirror extenders + Hand guards. These fleabay mirror extenders help me see around my elbows. They work good. The hand guards are more an appearance mod. I doubt you get much of any lever or fall-over protection. They do block the wind a little. With the matching white on them they look like they could be factory. I haven't (and probably won't) hook up the led turn lights in them. #6 - OEM Honda Grom rear shock. With my 210# riding weight... I've always felt the stock rear shock was too soft to dampen the spring. This would lead to mild pogo'ing over road bumps. The 1st gen Honda Grom shock (~$40 on fleabay) is a direct replacement and has much better shock absorbing and comparable spring rate. Rear end doesn't pogo anymore and feels more planted. Definitely worth it. #7 - Removed airbox + pod filter. Definitely more intake noise without the airbox... but a much cleaner look... especially without the tank plastics. I have a Mikuni VM22, intake and new filter on order... and will install that soon. #8 - Shinko Mobber knobbies. Installed the popular Grom Shinko knobbies on my Hellcat. I ride a bunch of dirt and gravel paths... and am a knobbies fan. They are definitely more buzzy (vibes) on the road. Which I believe let to my rear engine mount stock bolt failing on my first ride with the knobbies. Next up: - proper upgraded engine mount bolts - MotoCheez style 3rd engine mount plate - VM22, intake, filter - put plastics back on Cheers!
__________________
'20 TaoTao Hellcat 125 "grommet" '04 Yamaha TTR-125LE '00 Yamaha TTR-90 '07 Kinroad XT200GY Runmaster (sold) '07 KMD GY6 150cc ATV (sold) '07 Kangchao 250cc ATV Monster (sold) Baja Moto DB-30 "Doodlebugs"(x3) (sold) '06 Hi-Bird 200 parts bike (sold) |
|
|
|
06-27-2020, 11:41 PM
|
#7 |
|
Join Date: Mar 2015
Location: Spokane, WA
Posts: 253
|
More wrenching on the Hellcat today... nice weather and I need this kitty ready to ride (broken motor mount bolt)!
Mod #9 - upgraded motor mount bolts. Don't wait until one breaks like I did! I used 5/16 x 5 in, grade 8 bolts/nuts/washers. The 5 in bolt was a little too long but I was able to trim some threads off for perfect fit... and the 5 in bolt had a longer solid-shaft (no threads) part compared to the 4.5 in bolt... so maybe a tad stronger. Mod #10 - 3rd engine mount plate. Like MotoCheez... I made a plate that would bolt to the bottom engine mount holes and then get welded to the frame for support. I didn't have a piece of steel big enough to span both side-to-side bolts... but did have enough to use both front-to-back bolts down the middle of the engine. Welding upside-down was tricky... not my best ever job... but "that ain't going anywhere"! Mod #11 - balance front wheel. After mounting my Shinko knobbies... I felt an unbalance in the front wheel... quite noticeable. I decided to buy the cheap Pit Posse motorcycle wheel static balancer. I pulled off my front wheel and unseated the bead. I then spent way too long moving the tire in relation to the rim to find the best balance. Then I made it perfect with an ounce of stick-on weights. These combined mods... bolts, 3rd engine mount, balanced front wheel made a drastic improvement in ride quality! It rides so smooth now with no hint of unbalance. And the vibes in the footpegs are all but gone now... better than stock! So these were some VERY recommended mods.
__________________
'20 TaoTao Hellcat 125 "grommet" '04 Yamaha TTR-125LE '00 Yamaha TTR-90 '07 Kinroad XT200GY Runmaster (sold) '07 KMD GY6 150cc ATV (sold) '07 Kangchao 250cc ATV Monster (sold) Baja Moto DB-30 "Doodlebugs"(x3) (sold) '06 Hi-Bird 200 parts bike (sold) |
|
|
|
06-28-2020, 02:20 AM
|
#8 |
Join Date: May 2006
Location: Yuma, Arizona
Posts: 9,035
|
I really like the knobbies you put on the bike!

__________________
"They say that life's a carousel, spinning fast you got to ride it well..." TGB Delivery Scooter 150 TMEC 200 Enduro--carcass is sadly rotting in the backyard |
|
|
|
06-29-2020, 01:21 PM
|
#9 |
|
Join Date: Jun 2020
Posts: 62
|
Great info and mods! Motocheez videos made me want one. Ordered one and now the waiting begins. What exact engine bolts do I need? Plan on a pre-ride tear down like you did and just going replace them. Also, seen a few folks replacing the axle bolts with the Grom ones. Necessary?
|
|
|
|
08-10-2020, 10:17 PM
|
#10 |
|
Join Date: Mar 2015
Location: Spokane, WA
Posts: 253
|
Next update...
Mod #12 - VM22 Mikuni (knock-off) carb installed. I'm using the stock intake and stock carb spacer with the vm22. I tapered the plastic spacer to smooth the transition from the larger diameter carb. I like the carb facing the same direction as stock so the enricher ("choke") lever is on the easy to reach left side. Took me a few rounds of tuning to dial in the carb. Both stock jets in the vm22 were unmarked... but I was able to determine the main jet was a #95 like others have mentioned. I drilled out the main jet to ~#98... copying MotoCheez's mods. I left the pilot jet stock. I had to adjust the throttle needle a few times, but finally got low-mid range throttle good. I was unable to rev-out on the top-end with only the #98 main. So drilled it to #100. Now it's running great. Starts easy, idles fine, restarts quickly, and no bogging or hesitation in any part of the throttle range. Reaches max rpm and I even have a slightly higher top speed... 55mph indicated with my 210# self tucked. So final carb tuning (stock intake, pod air filter, stock exhaust): main = #100 pilot = stock A/F screw = 1 turn out needle = top notch (lowest needle setting) with washer Very happy with the bike overall. Love this little moto. I put the tank plastics back on... but didn't like how they felt between my knees when I'm squeezing the tank. So I took the tank plastics back off. I really dig the Mad-Max look. Not sure what if any will be the next mods. Think I'm just going to enjoy this moto for the rest of the season. And watch and see how the advanced mods work-out for everyone else. Cheers!
__________________
'20 TaoTao Hellcat 125 "grommet" '04 Yamaha TTR-125LE '00 Yamaha TTR-90 '07 Kinroad XT200GY Runmaster (sold) '07 KMD GY6 150cc ATV (sold) '07 Kangchao 250cc ATV Monster (sold) Baja Moto DB-30 "Doodlebugs"(x3) (sold) '06 Hi-Bird 200 parts bike (sold) |
|
|
|
09-01-2020, 01:08 PM
|
#12 | |
|
Join Date: Mar 2015
Location: Spokane, WA
Posts: 253
|
Quote:
I am running the stock front forks. They seem to be working fine for me at 210#. I can't recall ever bottom'ing them out on normal roads or trails I ride. If they were too soft, my first plan was to change the fluid in them... but I haven't felt the need to do that yet. I'm not jumping it... or doing wheelies... which would jolt the front pretty good. Cheers!
__________________
'20 TaoTao Hellcat 125 "grommet" '04 Yamaha TTR-125LE '00 Yamaha TTR-90 '07 Kinroad XT200GY Runmaster (sold) '07 KMD GY6 150cc ATV (sold) '07 Kangchao 250cc ATV Monster (sold) Baja Moto DB-30 "Doodlebugs"(x3) (sold) '06 Hi-Bird 200 parts bike (sold) |
|
|
|
|
05-15-2022, 09:22 PM
|
#13 |
|
Join Date: Mar 2015
Location: Spokane, WA
Posts: 253
|
Wow... 2 years already.
Pulled my Hellcat out of winter hibernation and she fired right up (thanks to a battery cutoff switch I put in to stop draining the battery as it sits). Put 30 miles on it today. Running well. Feels a tad lean at idle/mid-range. I'm still rocking the stock pilot jet on the VM22. Think I'll pull it and open it up a hair. Running well otherwise. Beyond perfect carb jetting... my only issue is a dancing speedo on the digital gauge. This started last season... but continues. It'll read steady (and good) for a while... then just start jumping around on the gauge... numbers bouncing down, up, higher than actual, etc. Sort of annoying. No wire problems detected on the front wheel sensor up to the harness. I'm hoping it's a front wheel sensor and not the gauge cluster. Happy riding. Cheers!
__________________
'20 TaoTao Hellcat 125 "grommet" '04 Yamaha TTR-125LE '00 Yamaha TTR-90 '07 Kinroad XT200GY Runmaster (sold) '07 KMD GY6 150cc ATV (sold) '07 Kangchao 250cc ATV Monster (sold) Baja Moto DB-30 "Doodlebugs"(x3) (sold) '06 Hi-Bird 200 parts bike (sold) |
|
|
|
05-15-2022, 09:44 PM
|
#14 |
|
Join Date: Dec 2018
Location: PNW
Posts: 982
|
Good to see a Hellcat out and about! What kinda battery cut off switch did you use?
|
|
|
|
05-25-2022, 11:15 AM
|
#15 |
|
Join Date: Mar 2015
Location: Spokane, WA
Posts: 253
|
I'm using a cheap disconnect switch like this one:
 I have it on the negative ground wire. Without it, the small power draw for the guages cluster would drain my battery over time (month-ish??). With this switch, no draw on the battery.
__________________
'20 TaoTao Hellcat 125 "grommet" '04 Yamaha TTR-125LE '00 Yamaha TTR-90 '07 Kinroad XT200GY Runmaster (sold) '07 KMD GY6 150cc ATV (sold) '07 Kangchao 250cc ATV Monster (sold) Baja Moto DB-30 "Doodlebugs"(x3) (sold) '06 Hi-Bird 200 parts bike (sold) |
|
|
|
|

|
 |
|
|


 Linear Mode

