 12-30-2010, 01:46 AM
|
#61 | |
|
Join Date: Jun 2006
Location: directly under the earths sun............NOW
Posts: 2,302
|
Quote:
The sprocket alignment looks good but I'll be happier once I actually try it and see how it works. I got to clean up out there, its a mess but I'll get the front engine brackets done first since there will be lots of cutting/grinding. |
|

|
|
12-30-2010, 09:35 AM
|
#62 |
|
Join Date: Oct 2006
Location: 11481 State Route 44 Mantua, Ohio 44255
Posts: 1,112
|
Just a suggestion... Yamabond #4 or Three Bond T1194, they are both basically the same, just different names. They make a rubberized seal that fuel, oil, heat etc. will not affect the material in the product. Yamabond #4 has been used since the 60's to assemble 2-stroke crank cases, without a gasket.
__________________
Thanks, Bruce @ Endless Journey Cycles "Phone Calls Only" ~330-274-0098~ Hours: Tue.-Fri. 10:00-6:00 Sat. 10:00-4:00 EST. Dealer for: Lifan, Crossrunner ATVs. http://www.endlessjourneycycles.net |
|
|
|
12-30-2010, 09:51 AM
|
#63 | |
|
Join Date: Jun 2006
Location: directly under the earths sun............NOW
Posts: 2,302
|
Quote:
|
|
|
|
|
12-30-2010, 04:31 PM
|
#64 |

Join Date: Mar 2009
Location: Sardis, BC, Canada
Posts: 25,977
|
Three Bond is an excellent product, and Loctite makes a version as well.
__________________
Weldangrind "I figure I'm well-prepared for coping with a bike that comes from the factory with unresolved issues and that rewards the self-reliant owner." - Buccaneer |
|
|
|
01-01-2011, 07:30 PM
|
#65 |
|
Join Date: Jun 2006
Location: directly under the earths sun............NOW
Posts: 2,302
|
Well its getting closer and closer.
I got the front engine mounts done WHEW so the engine can be bolted in securely. The carb manifold is done just need to make a gasket. I think I got the stock blaster clutch lever/cable to work but wont know until I get to ride it. I need to get the electrical stuff I'm missing and the thumb throttle & cable and choke cable. No kick start lever ....yet, it just wont fit with the rear brakes right there but I may have a solution to that but it is low priority. I got to clean up the gargage now its a mess and most of the heavy cutting/grinding & welding is done. |
|
|
|
01-03-2011, 02:11 PM
|
#66 |
|
Join Date: Jun 2006
Location: directly under the earths sun............NOW
Posts: 2,302
|
I was out looking thru my junk and found the exhaust.
(I thought I had bought one-you should never leave projects undone for to long) That saves me a little cash and headache but as you can see in the picture its a bit short.( ohh well it gives me something to do) I need to make a coupling of sorts since I just cant snake it thru the right opening in the frame. 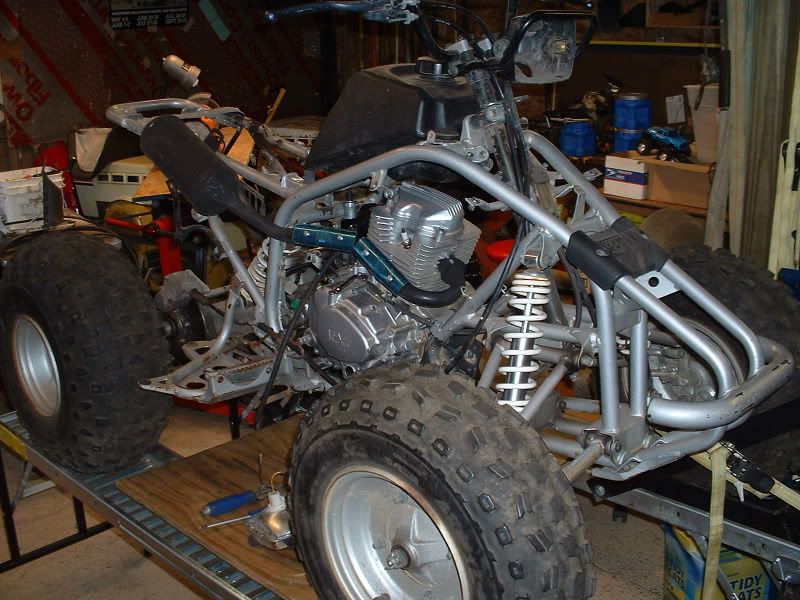 Tonight I hope to yank the engine out for like the hundreth time and flip the blastard up and check the welds and do some touch up.Then clean it all up and hit it with some paint to seal it until summer. Then it will go back on the stand, engine will go back in and I'll cut that exhaust to make it fit. Having that exhaust is great because it gives me something to do until the electrical stuff gets here. I noticed the rear brake cable has a broken adjuster at the rear disc, I hope I can come up with a teamcheap fix for that. |
|
|
|
01-03-2011, 04:05 PM
|
#68 |
|
Join Date: Jun 2006
Location: directly under the earths sun............NOW
Posts: 2,302
|
Thanks for the comments, it helps to keep me going.
This has been in the making for far to long and I must get it done and ride it in some snow this winter or I'll just pop. I purposefuly stuck it up on the rack in my gaarge so I could see it everytime I go in there as a reminder to get to work on it.  The 12 days off over christmas was just what I needed to get some major things done on it. |
|
|
|
01-03-2011, 04:22 PM
|
#69 |
|
Join Date: Mar 2009
Location: Sardis, BC, Canada
Posts: 25,977
|
I have that very exhaust on my Gio Beast. I have a replacement muffler for mine, and I've offered to perform surgery on Jim's as well. TurboT's Beast woke right up with a new muffler (along with other mods).
Check this out, if you're interested in opening up that muffler: http://www.chinariders.net/modules.p...wtopic&t=10760 Excellent work so far. Thanks for the updates. 
__________________
Weldangrind "I figure I'm well-prepared for coping with a bike that comes from the factory with unresolved issues and that rewards the self-reliant owner." - Buccaneer |
|
|
|
01-03-2011, 06:05 PM
|
#70 |
|
Join Date: Jun 2006
Location: directly under the earths sun............NOW
Posts: 2,302
|
Good reading on the exhaust mods THANKS.
The big problem here is if the muffler doesnt have "USFS" stamped on it meaning it is United States Forest Service approved and they catch me they can and most likely will fine my hiney. That doesnt mean I wont use it because I will but I'll start off with it stock so I hopefully wont have to do to much tuning. I dont want to have to mess with rejetting to much I'm hoping to just get it to fire up and run well enough to test it then fine tune from there. This summer I'll go for more performance after it has been taken on some shake down runs. I did do a little more welding on the bottom where I couldnt get to before and slapped some paint on it and came inside because the wifes chili smelled so good. |
|
|
|
01-04-2011, 11:25 PM
|
#71 |
|
Join Date: Jun 2006
Location: directly under the earths sun............NOW
Posts: 2,302
|
Not much more done really.
The engine is bolted in, carb is in (hope it doesnt leak), clutch is hooked up, chain is on, yeah it looks tight but it has free play and loosens up a tiny bit more once it comes off that lower chain roller. Ugly primer paint but thats all I have right now and I'll touch it all up this summer anyway.(if it runs- :roll: ) Heres the front engine mounts. Both had to be made to be removable so I can slide the engine forward out of the rear mounts and then just slide the engine out of the frame. They work perfectly. 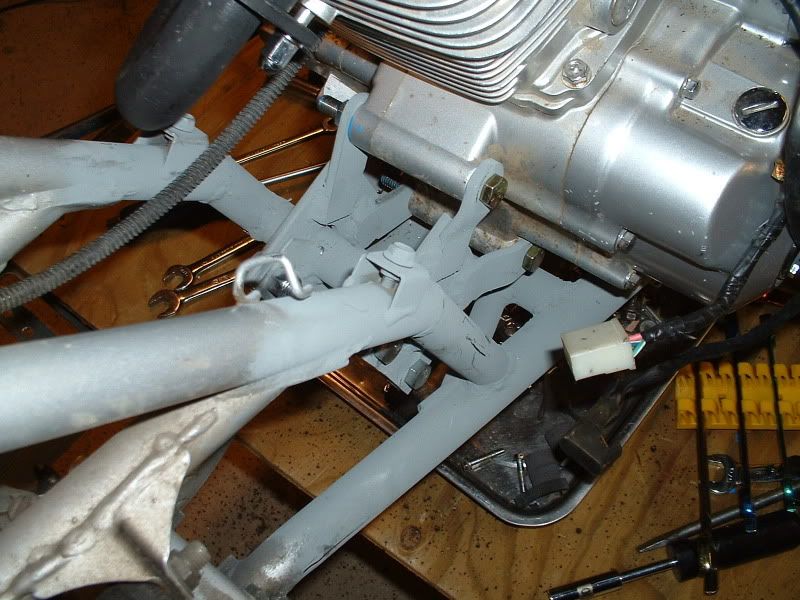 Heres just a left side shot. The fuel tank is going to have to be shimmed up just a little. 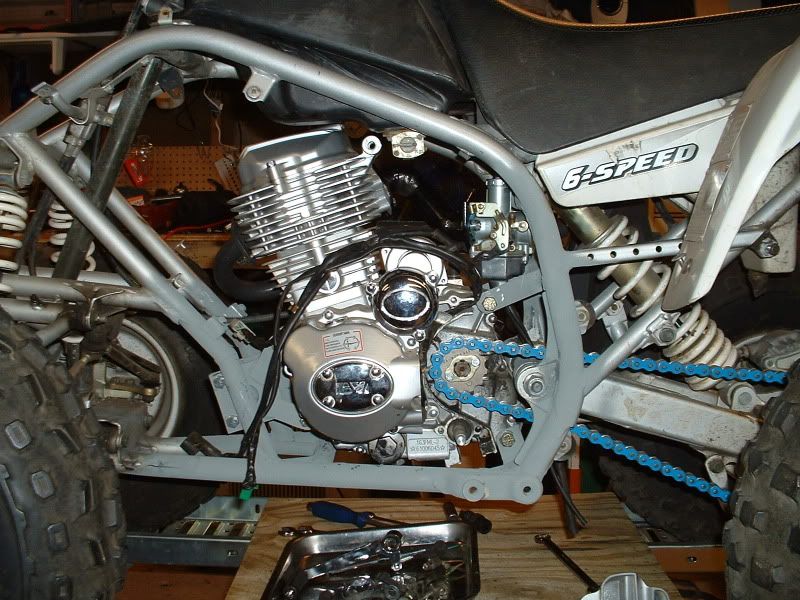 The exhaust pipe that had to be cut. I'll have to mod it a bit and make a coupling. 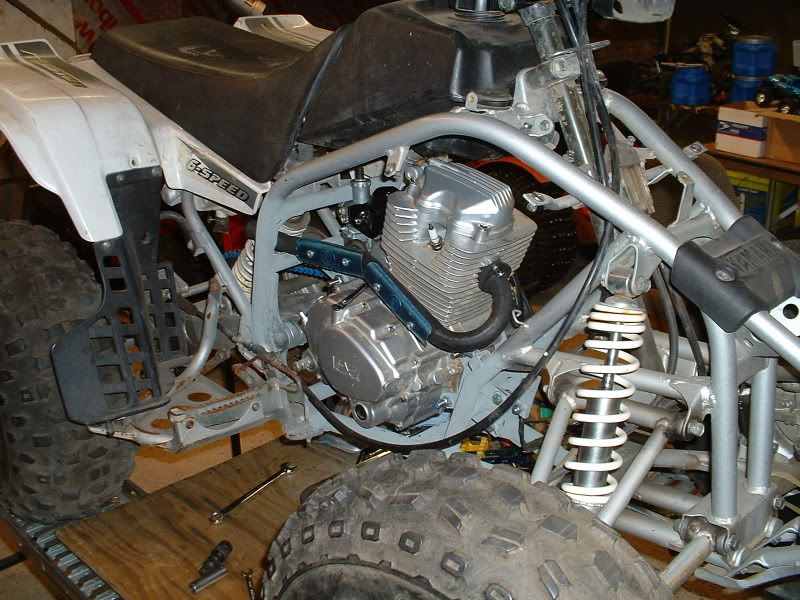 Still waiting on electrical so I can work on that exhaust. |
|
|
|
01-04-2011, 11:41 PM
|
#72 |
|
Join Date: Mar 2009
Location: Sardis, BC, Canada
Posts: 25,977
|
I don't know why, but I've always been drawn to the primer look, with red oxide being my favourite. Maybe because it implies a work in progress.
Glad to hear that the mounts are successful. It looks like the oil filter screen in accessible; can you remove the cap easily? Is the rear brake a dual-action setup (operable by either foot or hand)? Do you plan to use the top engine mount? It's not used on my Gio Beast atv. I recommend that you modify the "6-Speed" decal with a Sharpie. 
__________________
Weldangrind "I figure I'm well-prepared for coping with a bike that comes from the factory with unresolved issues and that rewards the self-reliant owner." - Buccaneer |
|
|
|
01-05-2011, 06:03 AM
|
#73 | |
|
Join Date: Jun 2006
Location: directly under the earths sun............NOW
Posts: 2,302
|
Quote:
 The rear brake is foot operated and also park with the front brake lever so all 4 tires are locked when park is applied. The top engine mount may still get cut off I have to decide if it will be worth doing, it hits the botom of the gas tank.That engine is rock solid in there even with the bolts just slid in. It would give me a bit more clearance from the bottom of the gas tank but then it would just rest on the valve cover.That upper mount isnt needed on this but if I were to want to put that engine back in a bike it would be needed so I am reluctant to cut it off. 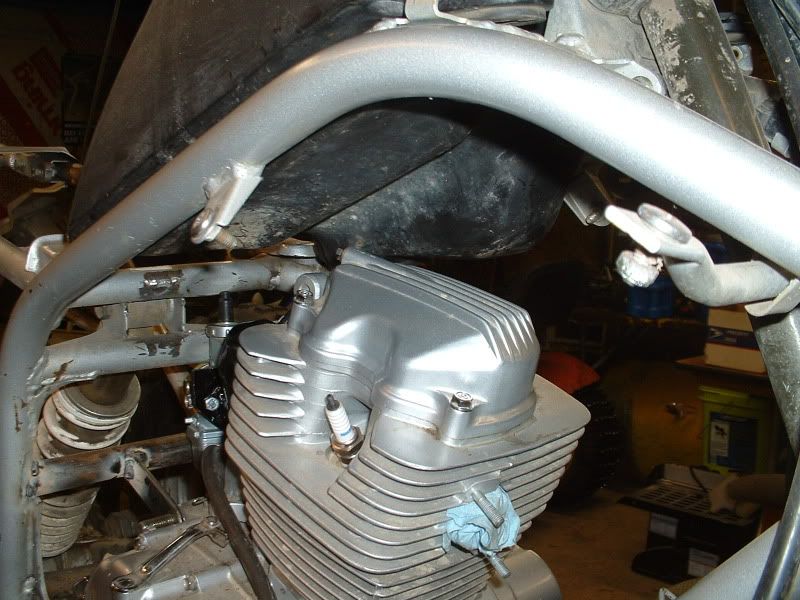 I'll do something with that 6-speed thing but most likely will cut that part of the sticker off. |
|
|
|
|
01-09-2011, 02:09 PM
|
#75 |
|
Join Date: Jun 2006
Location: directly under the earths sun............NOW
Posts: 2,302
|
Thanks.
If I could just get it to sound great but then I havnt been out working on it since its so cold out there in the garage and I havnt refilled my propane tanks yet. I'm going to try and get it to turn over today and maybe/hopefully pop then I'll work on the exhaust some more. |
|
|
|
|

|
 |
|
|


 Linear Mode

