 07-30-2010, 10:41 AM
|
#1 |
|
Join Date: Jul 2010
Location: Perth, Ontario, Canada
Posts: 17
|
Gio 125cc performance stator installed successfully
Hey folks,
I've had a previous post on this and was requested to do an updated post with my results. It's important to state that I've never done anything like this before and consider myself mechanically challenged. I'm just a dad trying to fix up his son's dirt bike. What led to this update was a rear wheel bearing let go and the chain flew off and wrapped itself into the chain guard area. Once the chain guard was removed, and several metal bits, I discovered the piece next to a large brass cylinder was broke. Upon some investigation I learned this was called a stator. I immediately went to the Gio site to purchase a new stator and chain guard only to discover that the stator was not in stock. Looking at the auctions, I saw there was a 125cc stator performance upgrade ... whatever makes it run I figure. I bid on the auction and at 1:45am I won it for $20. I packaged the order with the chain guard and in 2 days it was at my door step. I had an issue with getting the old bolts out for the original stator (I posted on this forum) and ended up using an "easy out" to remove the bolts (drill into the bolt and spin an "easy out" into it). Sounds like from the posting there are other tools that can be used. Installing the stator was simple and fit perfectly onto the engine. Just a heads up, oil leaks out when you remove the old stator. Once I had the new stator installed, I drained the rest of the oil and re-filled with clean oil. WARNING UPDATE: Be sure to secure the nut that holds the fly wheel. I'm updating this post because three days after the change the nut loosened enough for the fly wheel to shift off the shaft key causing the timing to fail. Hold the kick on one side of the bike while the nut is being tightened. 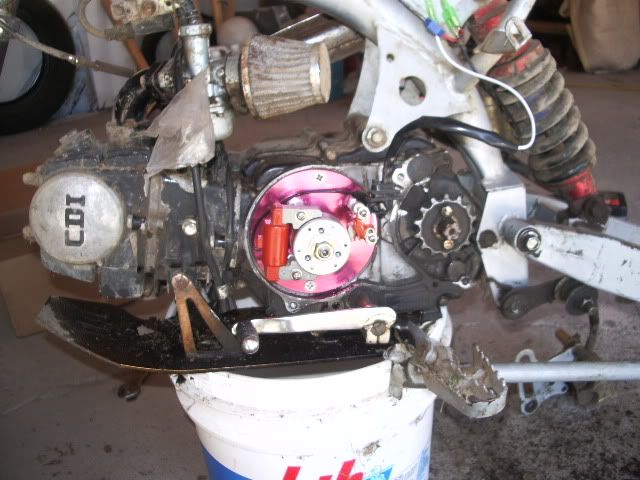 Now, what to do with all these wires? I used the old rubber CDI holder on the new red CDI that came with the stator to hold it under the seat. There are 5 wires to deal with on the new red CDI. The first two are obvious .. black on the stator goes to red on the CDI and white on the stator goes to white on the CDI. Note the red on the CDI has room for two wires .. the second wire is the striped wire from the kill switch. I cut a wire from the old stator and clipped it with the kill switch wire so that I could cleanly insert to the CDI red double connector. I connected the CDI green ground connector to the black wire from the kill switch. The last two CDI wires go to the coil. The green "connecting high pressure bag end" wire on the CDI connects to the green on the coil. The yellow "connecting high pressure" wire on the CDI connects to the striped wire on the coil. 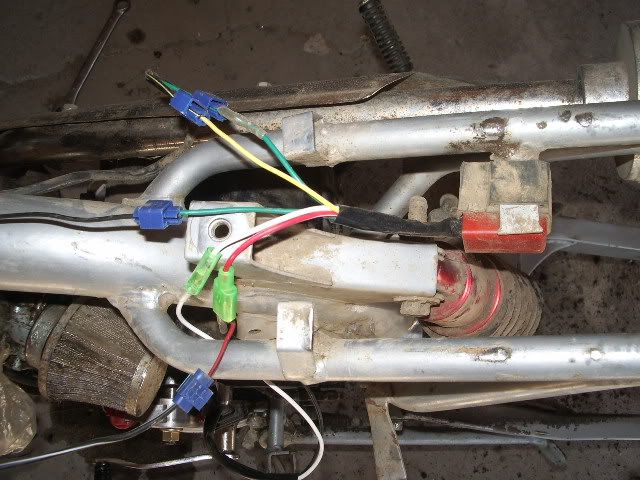 I then stuck on the gas tank, kicked started a few times and away it went. The only other change I need to do is pick up the idle as it won't keep running at a low idle. Anyways, sorry for the long post, but this is my story. I knew nothing about this a few days ago and now I have the bike back in action. The wiring looks daunting at first glance, but in the end there wasn't much to it. Good luck to anyone else upgrading their stator. |

|
|
|

|
|
|


 Threaded Mode