 08-25-2014, 01:14 AM
|
#46 |

Join Date: Mar 2009
Location: Sardis, BC, Canada
Posts: 25,977
|
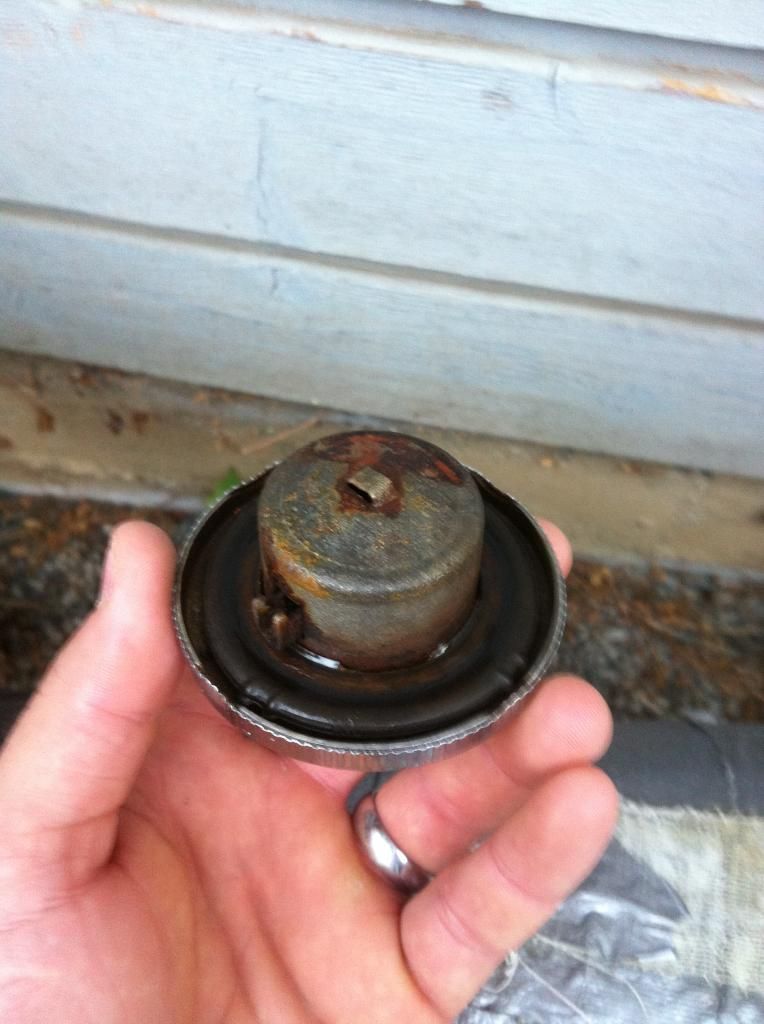
I don't really understand how reserve works with that style of petcock. The petcocks that I'm familiar with have two tubes, with the shorter being the reserve. How does it work with only one tube?
Good thinking on the cap. Please show us a pic of the existing cap. BTW, you might be able to flush some junk out with carb cleaner and compressed air.
__________________
Weldangrind "I figure I'm well-prepared for coping with a bike that comes from the factory with unresolved issues and that rewards the self-reliant owner." - Buccaneer |

|
|
08-25-2014, 01:45 AM
|
#47 | |

Join Date: May 2014
Location: Vancouver Island BC
Posts: 264
|
Quote:
"On" draws fuel from the tube. And "reserve" from the opening left around the tube The strainer covers it all aswell 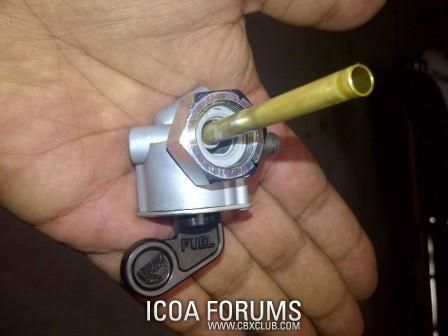 I'll get a couple pics of the cap tomorrow top and bottom. I'll probably tryed compressed air and carb cleaner though. Thanks Dave |
|
|
|
|
08-25-2014, 02:29 AM
|
#48 |
|
Join Date: Mar 2009
Location: Sardis, BC, Canada
Posts: 25,977
|
Interesting. So, the entire length of the tub is the reserve amount. Thanks for the explanation.
__________________
Weldangrind "I figure I'm well-prepared for coping with a bike that comes from the factory with unresolved issues and that rewards the self-reliant owner." - Buccaneer |
|
|
|
08-25-2014, 10:53 AM
|
#50 |
|
Join Date: Mar 2009
Location: Sardis, BC, Canada
Posts: 25,977
|
I haven't tried to dismantle that style of cap. Try the brake clean and compressor idea first, and see if that solves it. If not, you can likely take it apart and clean the spring, ball and seat.
__________________
Weldangrind "I figure I'm well-prepared for coping with a bike that comes from the factory with unresolved issues and that rewards the self-reliant owner." - Buccaneer |
|
|
|
08-25-2014, 11:52 AM
|
#51 |
|
Join Date: May 2014
Location: Vancouver Island BC
Posts: 264
|
Yea. I'll see what I can do lol.
To go further into detail on the reserve topic Having 2 tubes is bennificual vs this style. This style will suck up anything that collects in the bottom of the tank. Having second tube will collect above the sludge. Rust. Ect Dave |
|
|
|
08-25-2014, 03:26 PM
|
#52 |
|
Join Date: Mar 2009
Location: Sardis, BC, Canada
Posts: 25,977
|
As an added benefit of the two-tube style, the tubes often have screens to prevent exactly what you're saying.
__________________
Weldangrind "I figure I'm well-prepared for coping with a bike that comes from the factory with unresolved issues and that rewards the self-reliant owner." - Buccaneer |
|
|
|
08-26-2014, 06:14 PM
|
#53 |
|
Join Date: May 2014
Location: Vancouver Island BC
Posts: 264
|
Continued from another thread. Also at the post office was this funny looking box
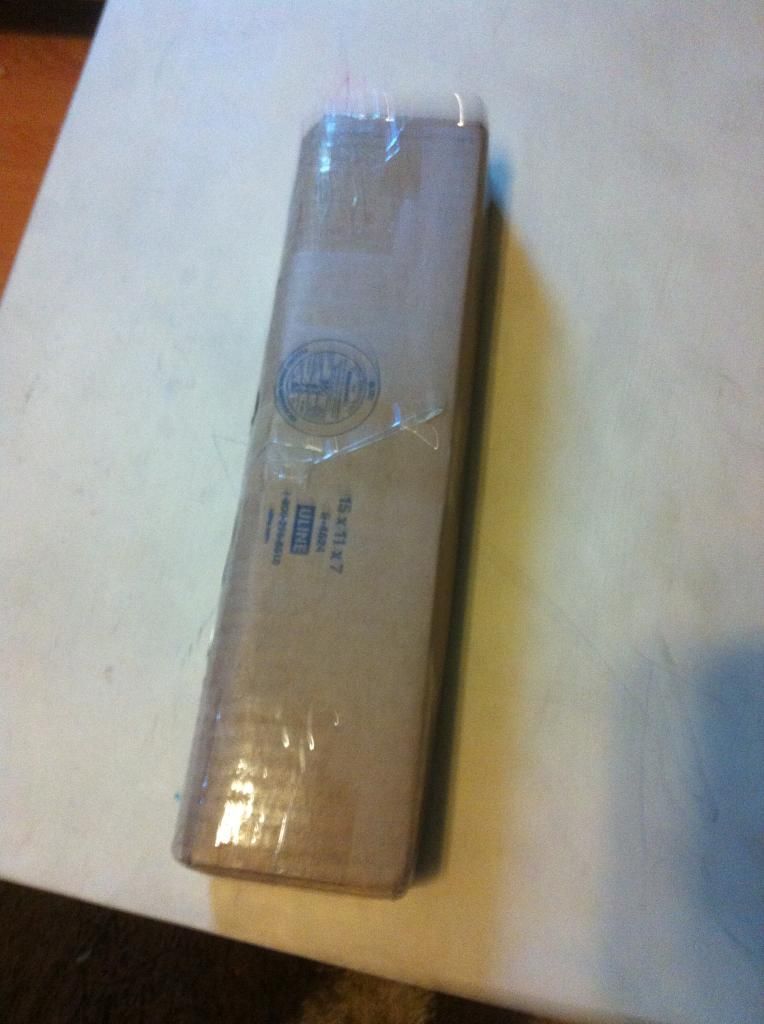 The contents 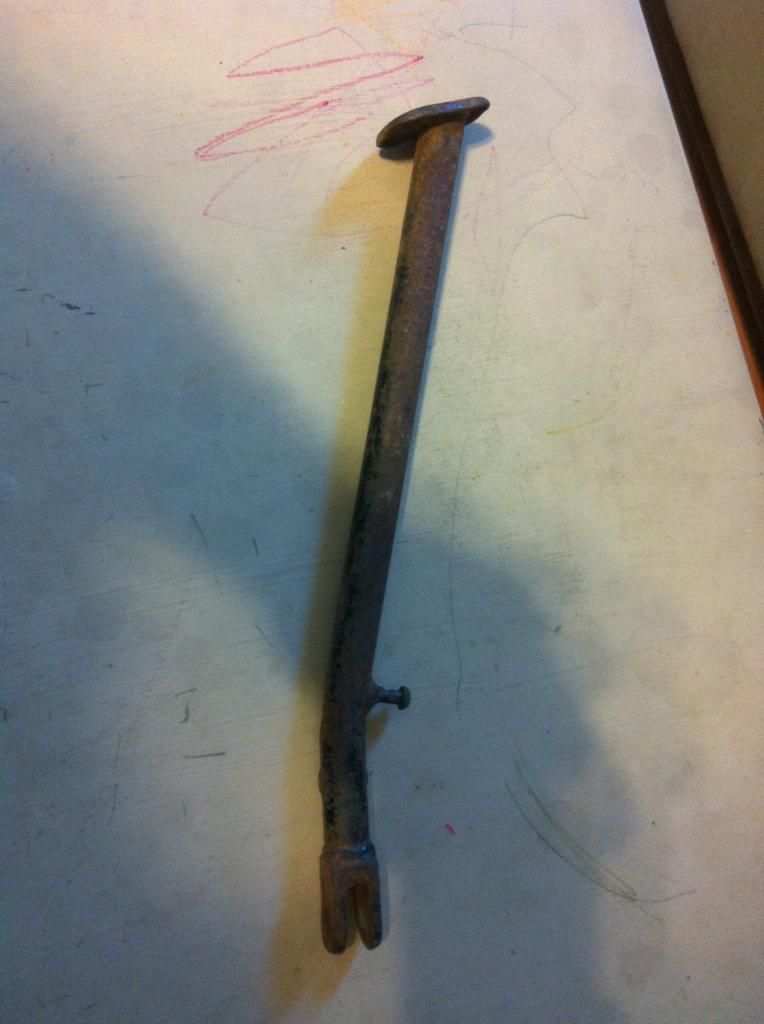 Here it is next to the "original" I'm bringing it all to work tomorrow to make the required modifications. But this is going to work out great   Thanks again weldangrind. Update on the gas cap. Had no issues today and we rod for quite a while Dave |
|
|
|
08-27-2014, 01:02 AM
|
#54 |
|
Join Date: Mar 2009
Location: Sardis, BC, Canada
Posts: 25,977
|
Happy to help. I'm surprised it made it there that quickly. It looks like you already had a bolt for it.
Glad to hear that Jess' gas cap is working.
__________________
Weldangrind "I figure I'm well-prepared for coping with a bike that comes from the factory with unresolved issues and that rewards the self-reliant owner." - Buccaneer |
|
|
|
08-27-2014, 01:08 AM
|
#55 | |
|
Join Date: May 2014
Location: Vancouver Island BC
Posts: 264
|
Quote:
Should have updates tomorrow Dave |
|
|
|
|
08-27-2014, 01:22 AM
|
#56 |

Join Date: Jul 2008
Location: Idaho
Posts: 25,054
|
Cut the kickstand to the desired length, then weld a nice big foot on it.

__________________
Spud "Never argue with an idiot. He will drag you down to his level, and beat you with experience."  Mark Twain Mark Twain2015 Zongshen ZS250GY-3 (RX3) 2006 Zongshen ZS200GY-2 (Sierra 200) 2005 Honda XR650L 2004 Honda CRF250X 1998 Kawasaki KDX220 Mods made to my Zongshen ZS200GY-2: http://www.chinariders.net/showthread.php?t=6894 |
|
|
|
08-27-2014, 11:28 PM
|
#57 |
|
Join Date: May 2014
Location: Vancouver Island BC
Posts: 264
|
Here it is guys
Probably more pictures then required. But oh well lol Here's what I started with (thanks to weldangrind ) I started by cutting the spring tab off as it needs to be moved to the opposite side 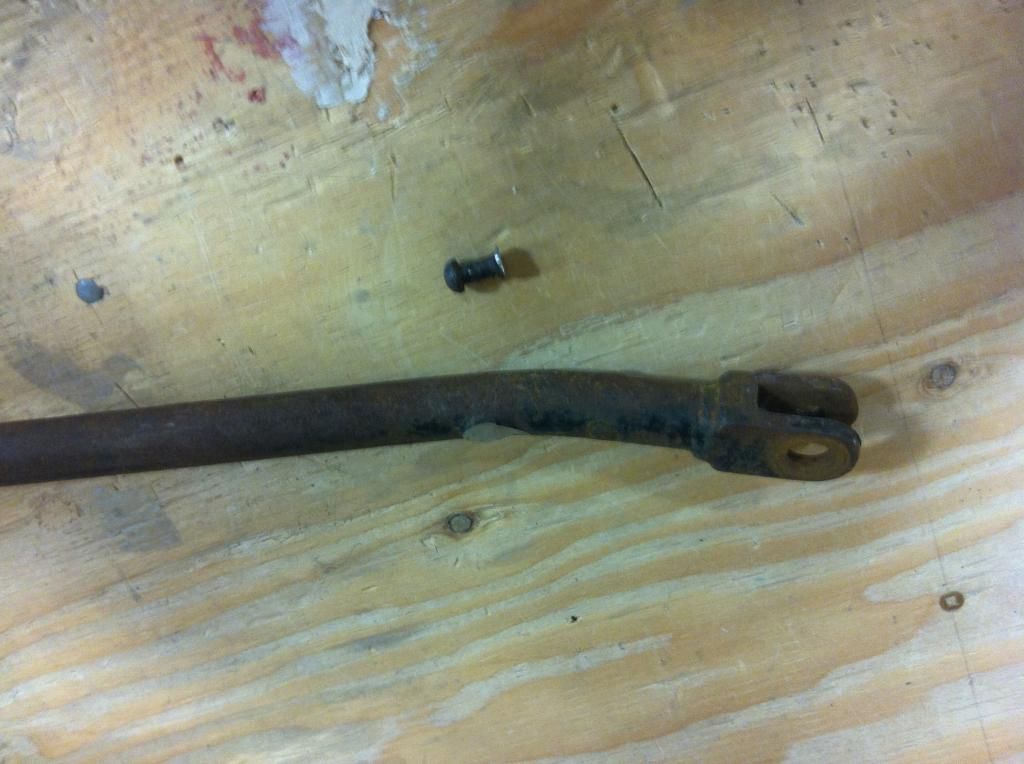 I scribed a line down the length of the shaft so I could line it back up after cutting as the foot is perfect Here it is in the band saw at work  Cutting 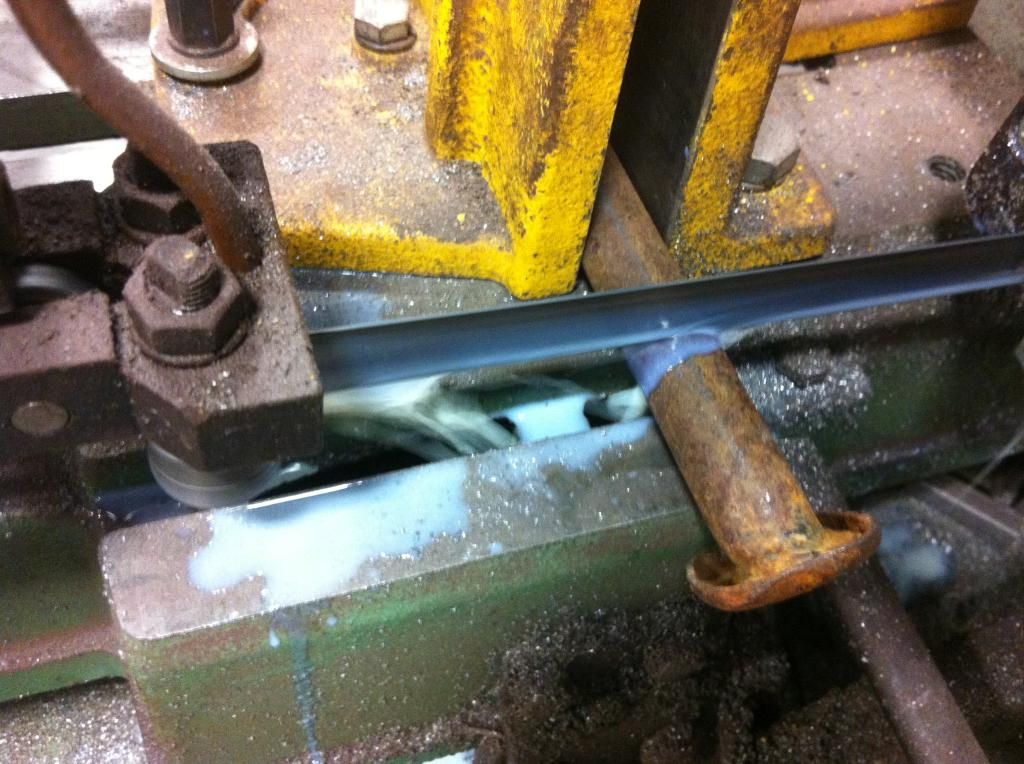 I cut 3 1/2 inches out of the length. I figured this way was easier then trying to cut the weld at the foot and recreate the angle  I ground a pretty good bevel onto both pieces. I did this cause I knew I was going to grind most of the weld away to clean things up  Line my marks up for welding and tack it 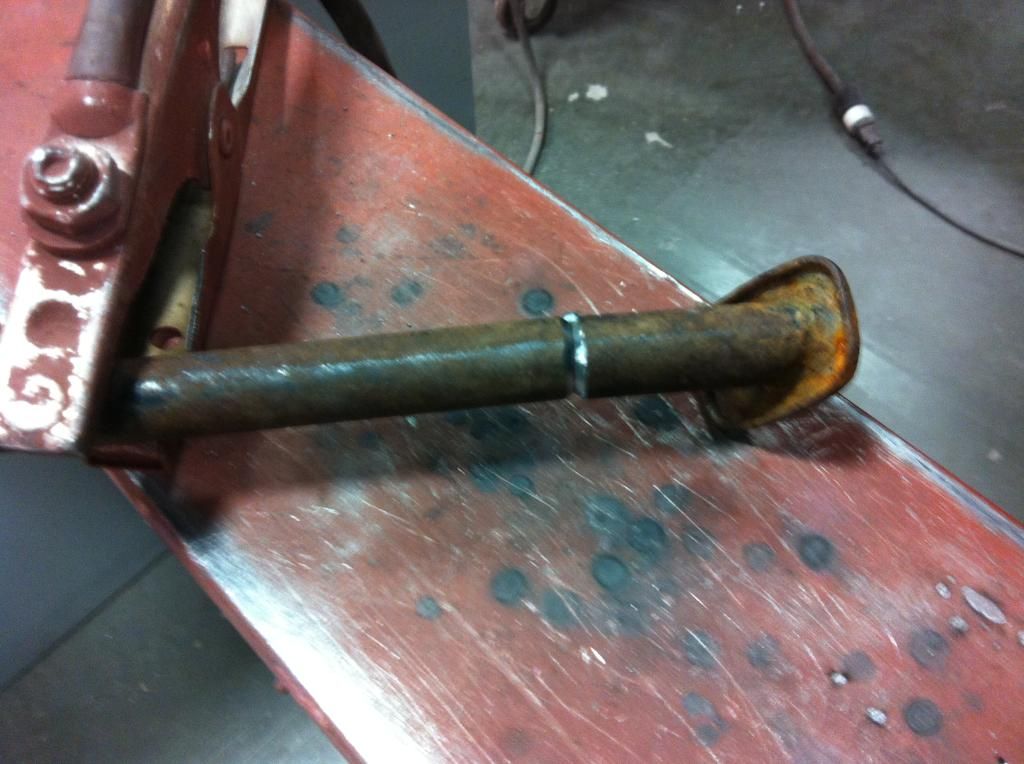 Terrible picture. But welded all the way around  Now I welded the tab back on. I'm still not used to the welders at work. But it'll hold. I use a hobby grade flux core mig at home. Works great. Our shop at work is divided into 2 wood shop and metal shop. I work in the wood shop. It's nice having both at my disposal lol 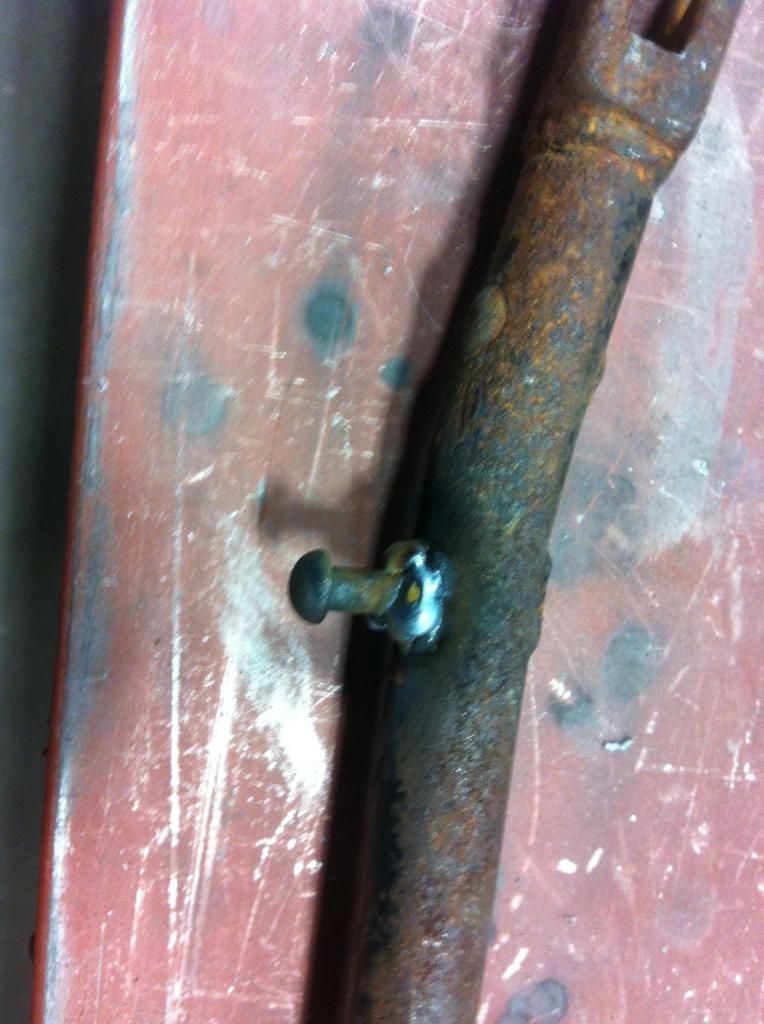 Here's the kickstand before grinding the welds smooth and cleaning it up  Here it is with the weld ground smooth. And what's left of the weld from where the tab was originally 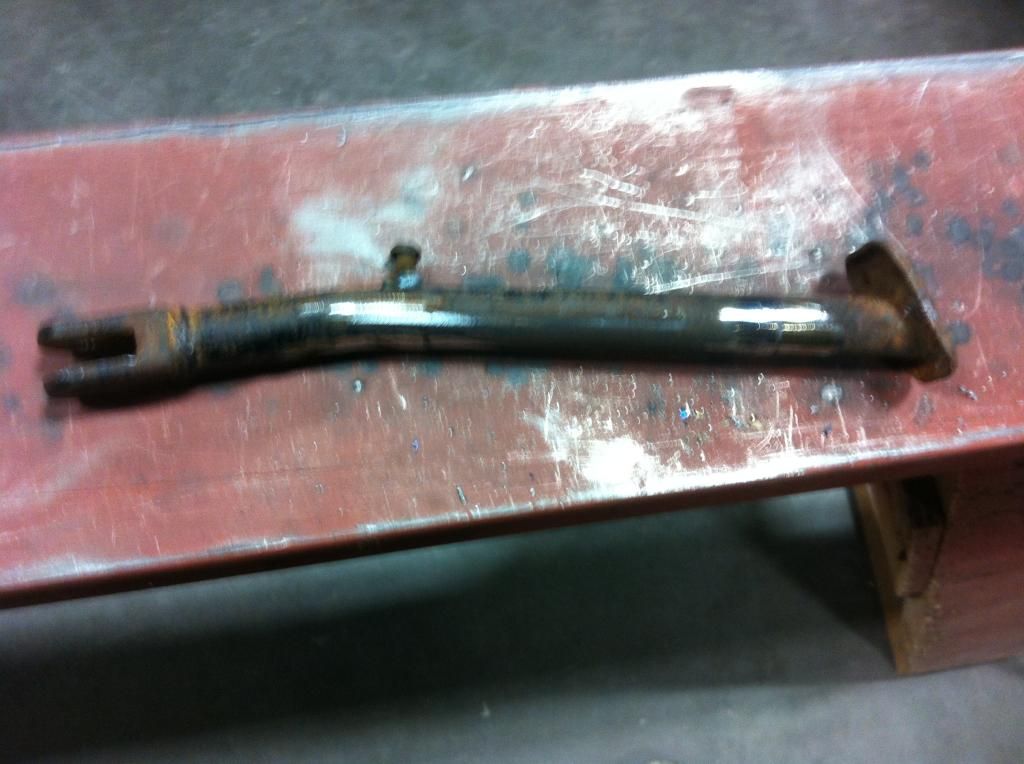 I finished cleaning it up and sprayed a quick coat of paint  Here is version 1 next to version 2 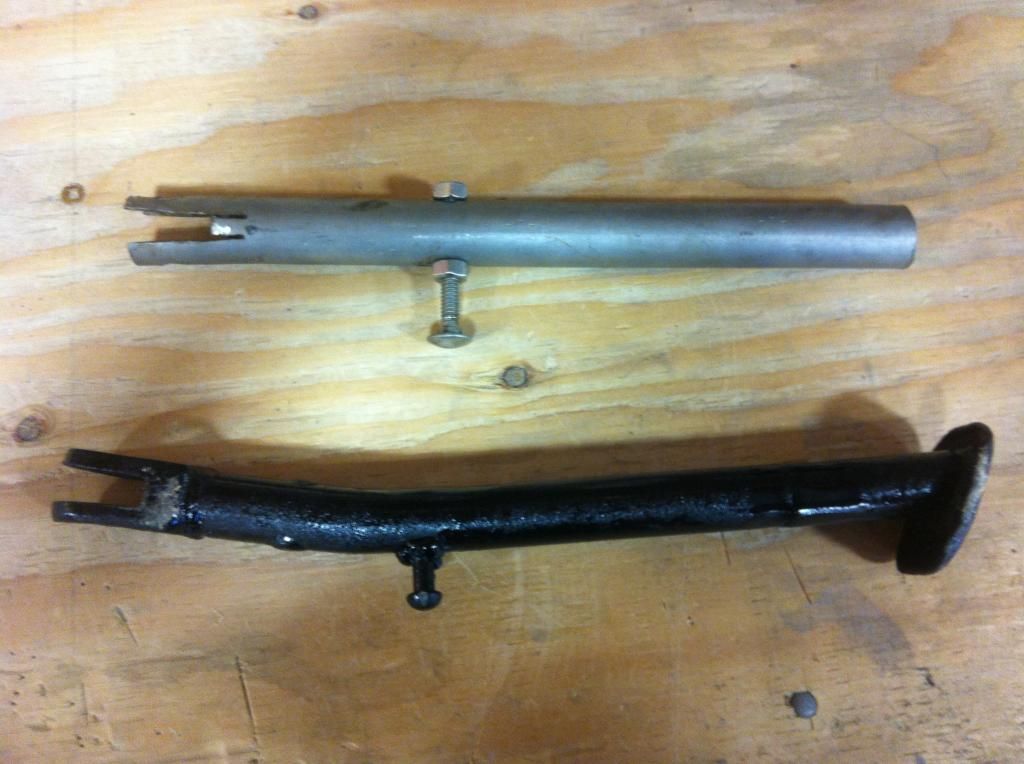 I got home and was excited to get it installed. Went smooth as butter. 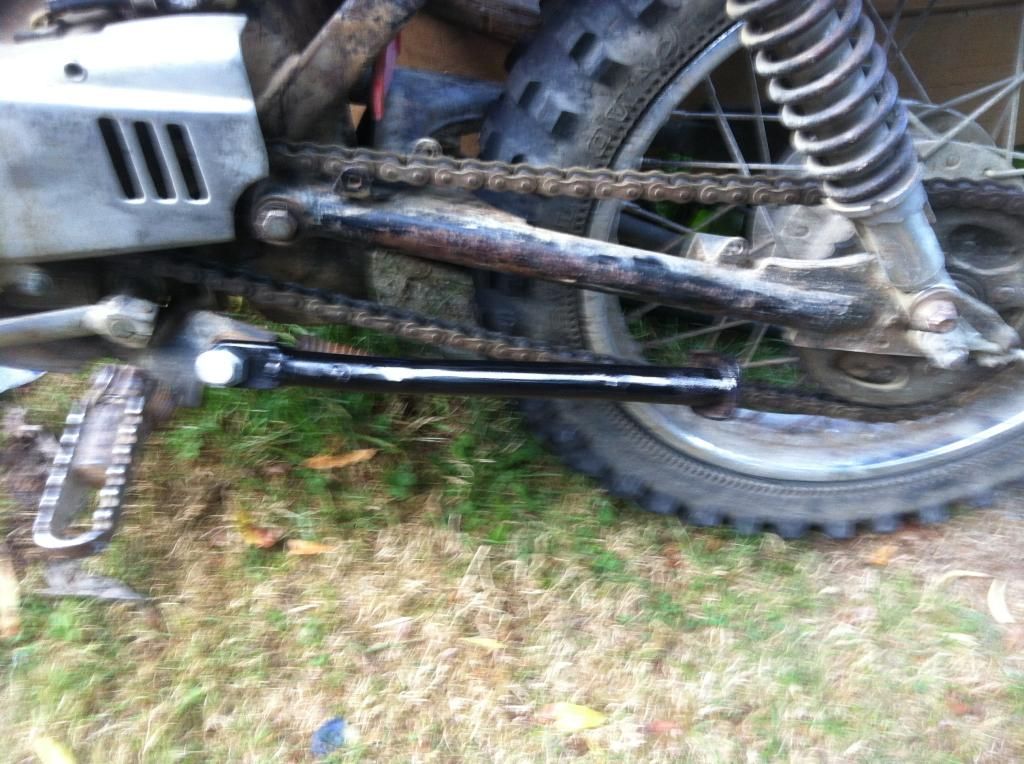 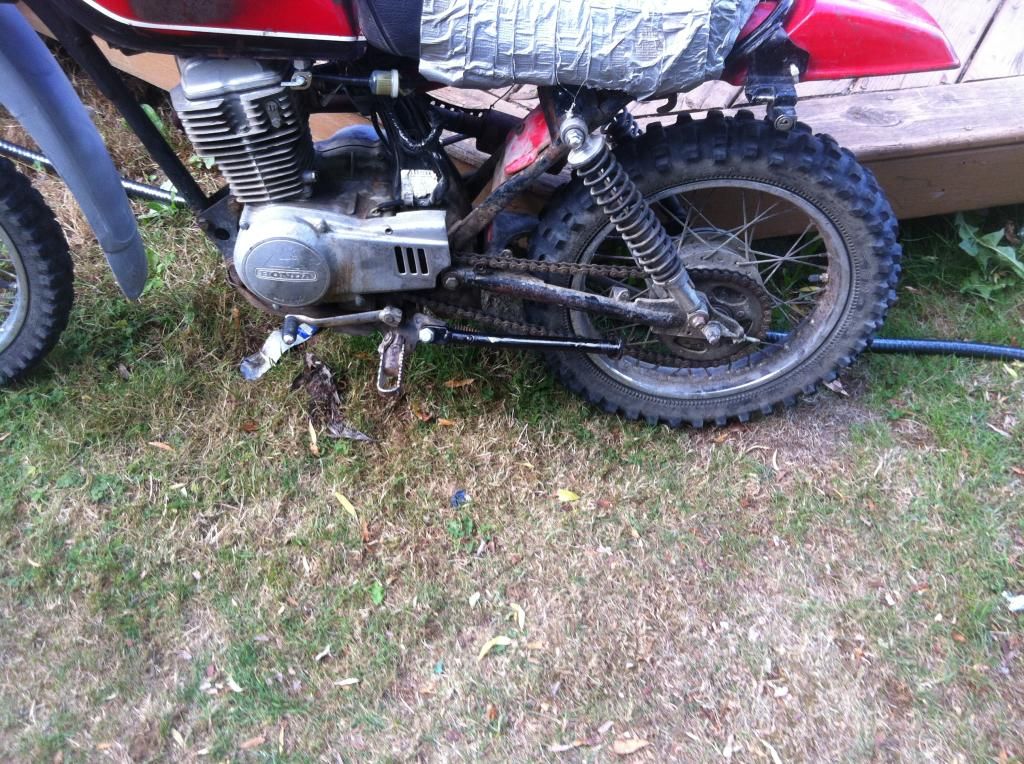   Here it is on the stand. It is much much more stable them version 1 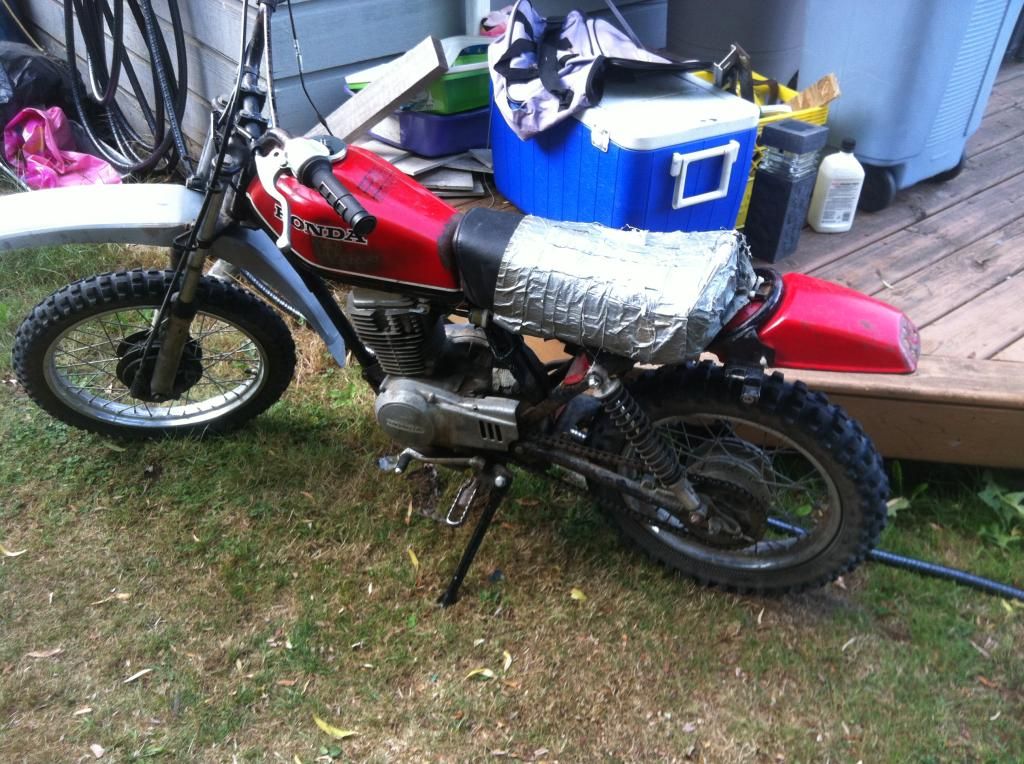 It also looks a million times better then version 1 Thanks for all your help everyone I think the seat is next on the agenda for this project as it's an eyesore Dave |
|
|
|
08-28-2014, 01:44 AM
|
#58 |
|
Join Date: Jul 2008
Location: Idaho
Posts: 25,054
|
Nice work, as always.
__________________
Spud "Never argue with an idiot. He will drag you down to his level, and beat you with experience." Mark Twain2015 Zongshen ZS250GY-3 (RX3) 2006 Zongshen ZS200GY-2 (Sierra 200) 2005 Honda XR650L 2004 Honda CRF250X 1998 Kawasaki KDX220 Mods made to my Zongshen ZS200GY-2: http://www.chinariders.net/showthread.php?t=6894 |
|
|
|
08-28-2014, 11:05 AM
|
#59 |
|
Join Date: Mar 2009
Location: Sardis, BC, Canada
Posts: 25,977
|
I'm surprised! I thought that kickstand was bent, but it seems to have the perfect angle to suit the chain and swingarm. Nice job.
If you can't get on the seat right away, at least substitute the duct tape for Gorilla Tape. It's much stronger, and it's black.
__________________
Weldangrind "I figure I'm well-prepared for coping with a bike that comes from the factory with unresolved issues and that rewards the self-reliant owner." - Buccaneer |
|
|
|
08-28-2014, 11:23 AM
|
#60 | |
|
Join Date: May 2014
Location: Vancouver Island BC
Posts: 264
|
Quote:
As I wanted to add some angle to version 2 anyways to make it more stable. I'll get a top view with kickstand up tonight it barely sticks out the side Dave |
|
|
|
|
|

|
 |
|
|


 Linear Mode

