 04-12-2024, 11:23 AM
|
#16 | |
|
Join Date: Aug 2022
Location: Lincoln CA
Posts: 104
|
Quote:
Best of luck with a successful installation!
__________________
-2024 CSC TT250, stage 3 motocult kit, Nibbi PE28FL with custom-made cable controlled choke, modified stock muffler (larger diameter tailpipe), custom oil cooler installation with relocated stock evaporative emissions canister, oversized stainless steel footpegs, IMS folding tip shifter, a few little blingy bolts and bits. More personal preference mods to come. |
|

|
|
04-12-2024, 01:01 PM
|
#17 |
Join Date: Oct 2021
Location: The burbs of Chicago
Posts: 232
|
The guy I saw used an old link that was cut off to press against the side of the new master link, then a regular clamp to squeeze it down carefully.
Tapering the master link pins is where I'm scratching my head, without using the special tool. Also, does it sound like a good idea to lay the new chain next to the old one to measure it, and remove the new links to keep it 1-2 links longer than the old one? I'm sooo worried about removing a link too many.
__________________
2021 CSC TT250 |
|
|
|
04-12-2024, 01:28 PM
|
#18 | |
|
Join Date: Aug 2022
Location: Lincoln CA
Posts: 104
|
Quote:
As for being worried about removing too many links, just wrap the chain around the sprockets, on the bike, and leave one end of the chain at about the 2 o'clock position on the rear sprocket. Then bring the other end of the chain up to meet that end of the chain that's already on the sprocket while pivoting back as many links as you need to in order to make the ends meet. Physically mark the chain with a grease pencil, crayon, paint dab, or whatever so you're absolutely sure you'll be shortening the chain on the right link. I think that once you go to do it you'll realize it's not as complicated as you may be thinking it is.
__________________
-2024 CSC TT250, stage 3 motocult kit, Nibbi PE28FL with custom-made cable controlled choke, modified stock muffler (larger diameter tailpipe), custom oil cooler installation with relocated stock evaporative emissions canister, oversized stainless steel footpegs, IMS folding tip shifter, a few little blingy bolts and bits. More personal preference mods to come. |
|
|
|
|
04-12-2024, 01:49 PM
|
#19 |
|
Join Date: Oct 2021
Location: The burbs of Chicago
Posts: 232
|
https://www.rockymountainatvmc.com/p...x-ring-chain-p
This is the one, but I can't remember if I saw a master clip. Well if it is the other, I'll have to run to a store to get the proper tool, that's why I'm nervous since this operation is crucial to maintaining life.
__________________
2021 CSC TT250 |
|
|
|
04-12-2024, 02:10 PM
|
#20 |
|
Join Date: Aug 2022
Location: Lincoln CA
Posts: 104
|
DID makes both a clip-type and rivet-type master link for that series chain. I'm not sure which it ships with. Maybe both? The clip-type makes for an easier installation, but the rivet-type is more secure, at least when riveted properly it's more secure. The downside to the rivet-type is that if you change gearing often back and forth from on-road to off-road gearing, and that gearing change requires a change in the chain length, you have to replace the rivet-type every time. They're a one-shot deal.
__________________
-2024 CSC TT250, stage 3 motocult kit, Nibbi PE28FL with custom-made cable controlled choke, modified stock muffler (larger diameter tailpipe), custom oil cooler installation with relocated stock evaporative emissions canister, oversized stainless steel footpegs, IMS folding tip shifter, a few little blingy bolts and bits. More personal preference mods to come. |
|
|
|
04-12-2024, 05:40 PM
|
#21 |

Join Date: Apr 2017
Location: Omaha, NE
Posts: 7,909
|
I've seen a guy do a riveted master link with nothing but hand tools. Pliers, vice grips, some wood, a center punch, and a hammer.
Specialty tools make it easier/faster, but definitely not needed.
__________________
2018 Hawk 250 - Full Mod list here. http://www.chinariders.net/showpost....62&postcount=1 Hawk Information and Resource guide: http://www.chinariders.net/showthread.php?t=20331 2010 VFR1200F - http://chinariders.net/showthread.php?t=20708 |
|
|
|
04-12-2024, 07:30 PM
|
#22 |
|
Join Date: Oct 2021
Location: The burbs of Chicago
Posts: 232
|
Well I caved and ran to the shop for a $30 nicer set (on sale from $90!!). Then got home and see the link came with both types of connections. Well... Might as well rivet 'er on! I can see now judging by how thin these clips are why it's a weak point.
__________________
2021 CSC TT250 |
|
|
|
04-12-2024, 08:11 PM
|
#23 | |
|
Join Date: Apr 2017
Location: Omaha, NE
Posts: 7,909
|
Quote:
__________________
2018 Hawk 250 - Full Mod list here. http://www.chinariders.net/showpost....62&postcount=1 Hawk Information and Resource guide: http://www.chinariders.net/showthread.php?t=20331 2010 VFR1200F - http://chinariders.net/showthread.php?t=20708 |
|
|
|
|
04-12-2024, 08:13 PM
|
#24 | |
|
Join Date: Aug 2022
Location: Lincoln CA
Posts: 104
|
Quote:

__________________
-2024 CSC TT250, stage 3 motocult kit, Nibbi PE28FL with custom-made cable controlled choke, modified stock muffler (larger diameter tailpipe), custom oil cooler installation with relocated stock evaporative emissions canister, oversized stainless steel footpegs, IMS folding tip shifter, a few little blingy bolts and bits. More personal preference mods to come. |
|
|
|
|
04-13-2024, 08:34 AM
|
#26 | |
|
Join Date: Oct 2021
Location: The burbs of Chicago
Posts: 232
|
Quote:
MacGyver is my hero. I got into electronics repair over 20yrs ago largely due to him, and wanted a dirtbike since I was kid because of him blasting through a fiery village in Burma on some kind of olive drab dual sport.
__________________
2021 CSC TT250 |
|
|
|
|
04-13-2024, 09:52 AM
|
#27 |

Join Date: Feb 2021
Location: Kansas City
Posts: 2,205
|
I used to use the continuous link style (rivet type master link) on big bikes. But I also use the clip type on my dirt bikes. They are much easier to deal with.
Some people are afraid of dropping their chain mid-ride. I suppose it is possible but I have never had this happen even after lots of removal/replace for lubrication. I think it is important to make sure that the open end of the clip is on the trailing side. Maybe if that convention isn't followed, the clip can get pushed off by debris. Makes sense. The clip type master link is standard on a KTM 250 SX (motocross). It must be pretty dependable! And yes, always keep a roll of bailing wire, some paper clips, rope, old wires and a soldering iron, duct tape, and a bearing press kit handy. Wasn't that the Army's diesel KLR project MacGyver was riding through the burning town ?! lol
__________________
-2022 5 speed Templar X Orange, OEM 51T rear sprocket, 14T front sprocket -NOS 2020 KTM 250SX (2-stroke motocross), less than 10 hours on it Last edited by Thumper; 04-13-2024 at 10:38 AM. |
|
|
|
04-15-2024, 08:21 AM
|
#28 |
|
Join Date: Oct 2021
Location: The burbs of Chicago
Posts: 232
|
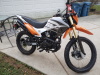
Success!!! Turns out it only had the clip style link included. And to make things even better, the one on there had a clip so I didn't have to cut it off, AND the 130 link chain I got (DID 428 VX X-Ring https://www.rockymountainatvmc.com/p...x-ring-chain-p) was a dang-gone perfect fit for the 17T front and 45T rear sprockets, so no cutting was needed whatsoever. It adds maybe 3-5mph to the top of each gear, so before I was at 6k rpm at 55mph, now it's 60mph which I can hold easily. Thanks so much for the help everyone!
And an added bonus, as I pulled into work this morning, this happened... 
__________________
2021 CSC TT250 |
|
|
|
04-15-2024, 08:26 AM
|
#30 |
|
Join Date: Feb 2024
Location: SW Missouri
Posts: 104
|
Diesel KLR!!
__________________
---------- 2023 Templar X 2009 Triumph Bonneville 1976 Yamaha DT175 1974 Honda MT125 |
|
|
|
|

|
 |
|
|


 Linear Mode

